SwiftUI App Localization in Xcode — Easy, Scalable
Recently, I updated my invocing app Reckord to support 24 different languages as part of my ASO strategy. Localization not only makes your app more accessible to a global audience but also increases your chances of ranking in non-English App Stores.
Here’s exactly how you can do it — in 7 simple steps.
1. Create a String Catalog
First, Create a String Catalog in my Xcode project:
In the Resources folder, right-click → New File → search for “String Catalog” → name it Localizable.
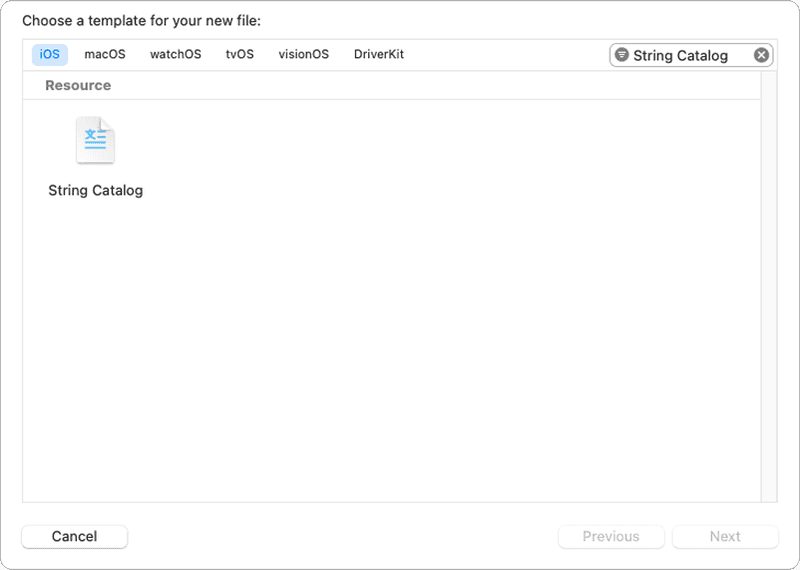
This will serve as the central place for all your translated strings.
2. Convert Static Strings into Localised Strings
Next, Replace all hardcoded static strings in your SwiftUI views with String(localized:) so they are ready for translation.
Here’s an example:
String (
    localized: "create_organisation_view.create.title",
    defaultValue: "New Organisation",
    table: "Localizable",
    comment: "Title for create organisation screen"
)
localized → The key for your string in the String Catalog.
defaultValue → The text for your base language (English in my case).
table → The name of your String Catalog file.
comment → Extra context for translators (and AI tools).
💡 Pro Tip: Create a constants file to make localization scalable and maintainable. Here’s how I structured mine:
public struct Constants {
    public struct CreateOrganisationView {
        public static let createOrganisationTitle: String = String(
            localized: "create_organisation_view.create.title",
            defaultValue: "New Organisation",
            table: "Localizable",
            comment: "Title for create organisation screen"
        )

        public static let editOrganisationTitle: String = String(
            localized: "create_organisation_view.edit.title",
            defaultValue: "Edit Organisation",
            table: "Localizable",
            comment: "Title for edit organisation screen"
        )

        public static let organisationNamePlaceholder: String = String(
            localized: "create_organisation_view.organisation.name.placeholder",
            defaultValue: "What is organisation's name?",
            table: "Localizable",
            comment: "Placeholder for organisation name filed in create/edit organisation screen"
        )
    }
}
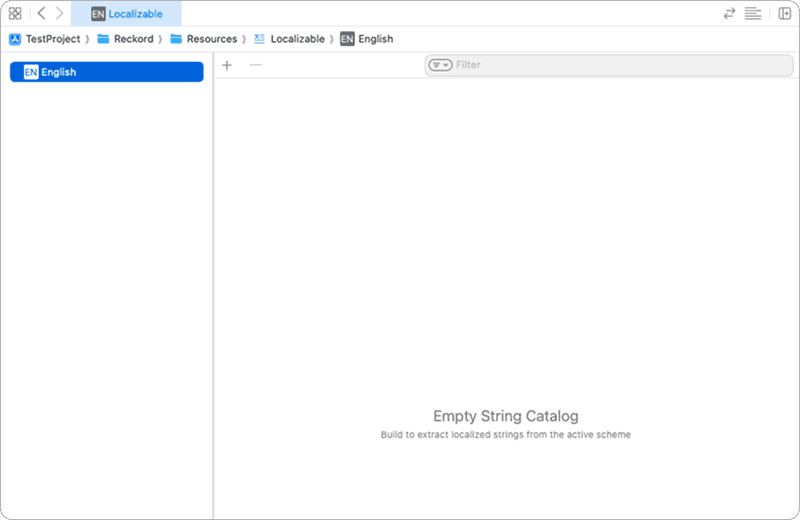
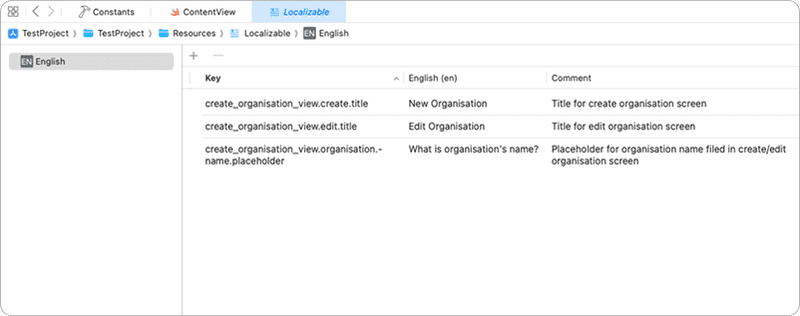
3. Build the Project to Populate the String Catalog
Once you replace all static strings, build the project(Product → Build).
Now, when you open the Localizable String Catalog, you’ll see all your keys under the English column.
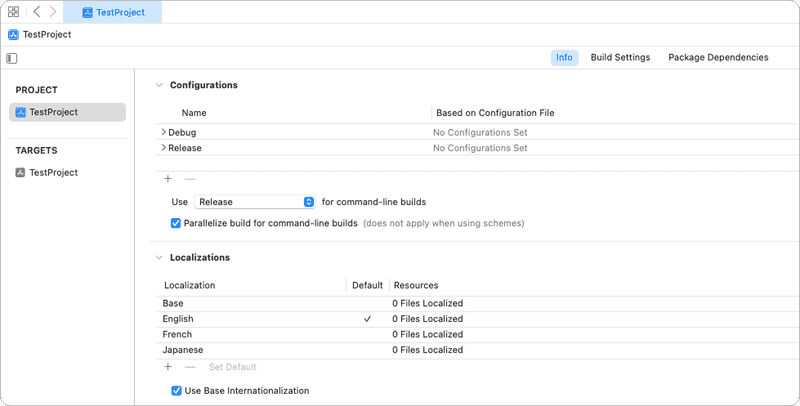
4. Add New Languages to Your Project
To prepare for translations, go to: Project Settings → Info Tab → Localizations → +
Add all the languages you want your app to support.
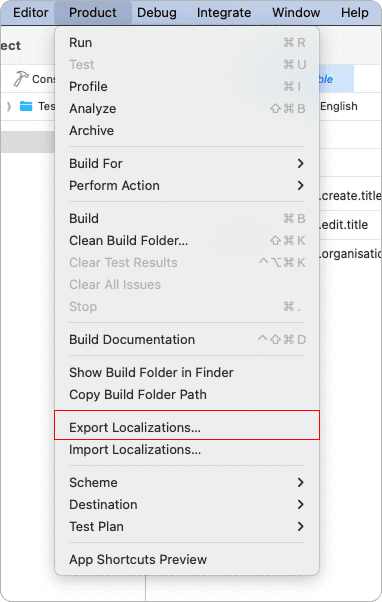
5. Export Localizations
Go to Product → Export Localizations… in Xcode.
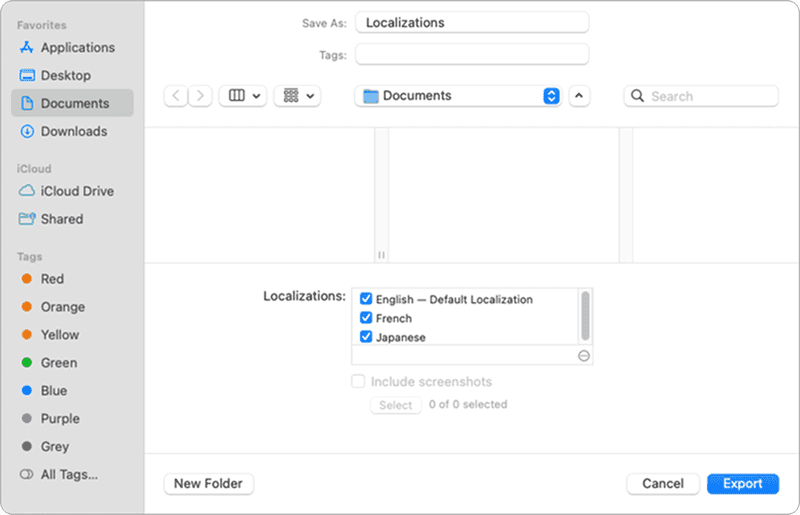
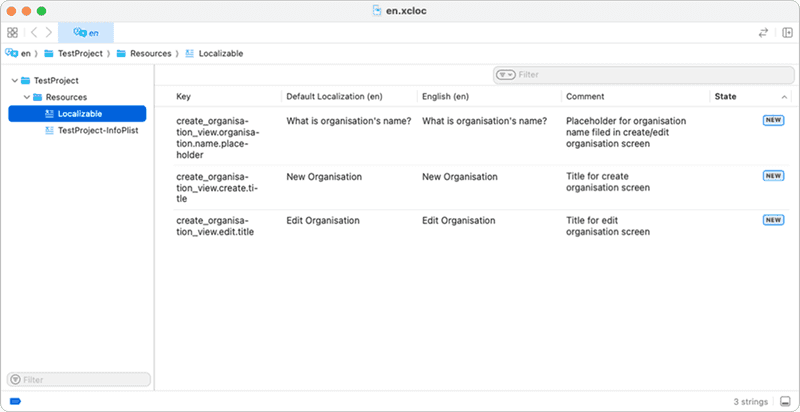
You can open this .xcloc file in Xcode to review it. It will contain all your string keys and their English values.
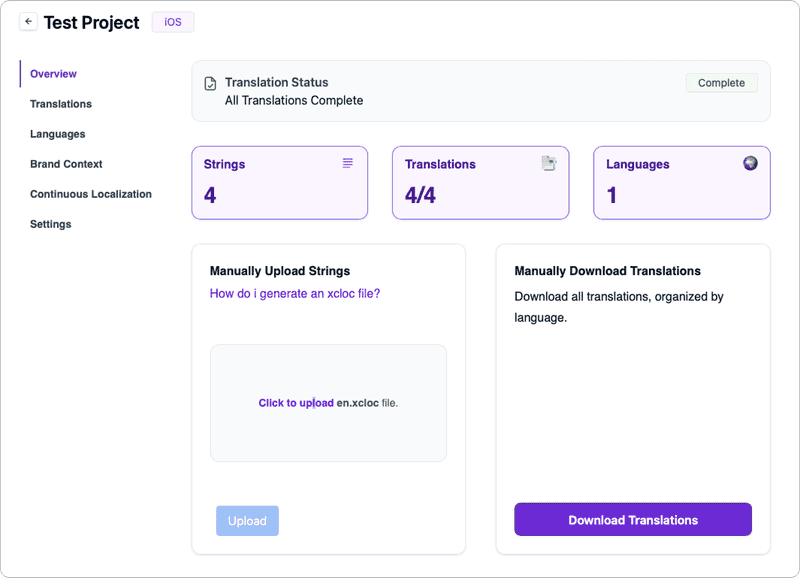
6. Translate Your .xcloc File
Instead of translating manually, You can use AI-powered localization tools(strings.dev in my case).
Some great tools include: localizebot.com, strings.dev
Steps:
- Upload your en.xcloc file.
- Select target languages.
- Download the translated .xcloc files.
7. Import Translations Back into Xcode
Go to Product → Import Localizations… in Xcode.

-
Select the .xcloc file you downloaded from the translation tool.
-
Xcode will merge these translations into your String Catalog.
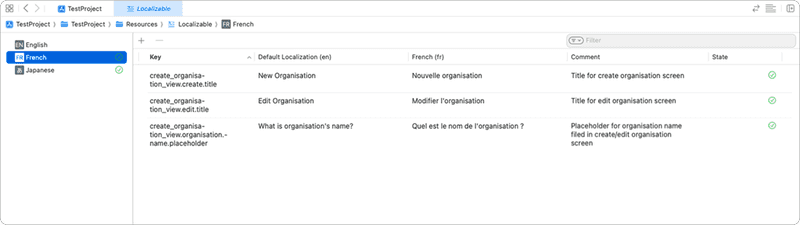
At this point, your Localizable catalog will show translations for each added language.
Final Result
Your app now supports 2 different languages(French, Japanese) — and You can easily add more in the future using this same process.
This way, you can scale your app and keep supporting new languages without a huge manual effort.
Thank you for reading! 😀 Stay safe and take care!
If you have any suggestions or a better approach, feel free to connect with me on X and send me a DM. If you enjoyed this article and would like to support me, Buy me a coffee.